
Changing TCP/IP settings manually in Windows 11 can help troubleshoot network issues or configure a static IP for devices on your network. Follow these steps to update your IP address, subnet mask, gateway, and DNS servers.
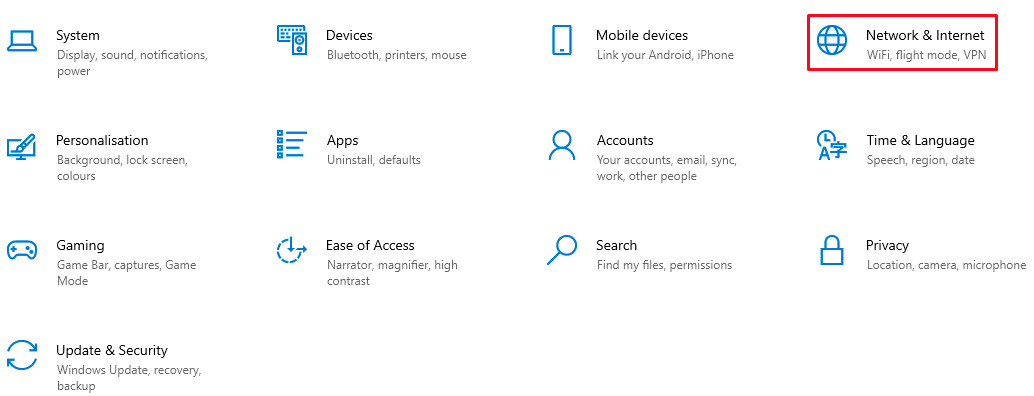
Step 1: Open Network & Internet Settings
Click the Start menu and select Settings. Then go to Network & Internet and choose Ethernet (for wired) or Wi-Fi (for wireless connections) depending on your network type.
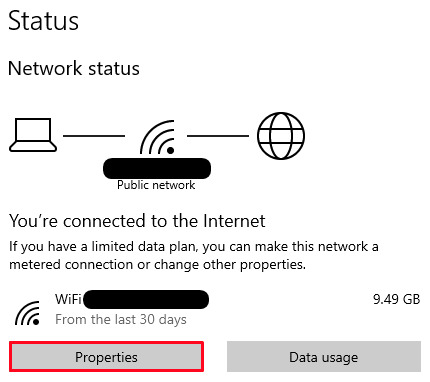
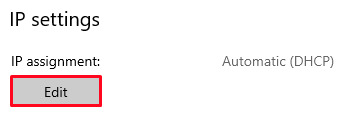
Step 2: Access Network Adapter Properties
Scroll down and click Hardware properties for your active connection. Then click Edit under IP assignment to configure manual IP settings.
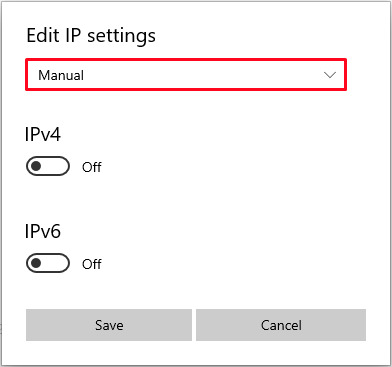
Step 3: Set IP Address Manually
Change the IP assignment from Automatic (DHCP) to Manual. Turn on IPv4 or IPv6 depending on your network. Enter the desired IP address, Subnet mask, and Gateway values provided by your network administrator.
Step 4: Configure DNS Servers
Still in the same window, enter the preferred and alternate DNS server addresses. You can use your ISP’s DNS or public DNS services like Google (8.8.8.8 / 8.8.4.4) or Cloudflare (1.1.1.1 / 1.0.0.1).

Step 5: Save and Test
Click Save to apply your changes. Then test your connection by opening a browser or running ping google.com in Command Prompt to ensure the settings work correctly.
Manually configuring TCP/IP settings gives you more control over your network and can resolve connectivity issues when DHCP fails or specific IP assignments are required.
Back to Blog